
Introduction
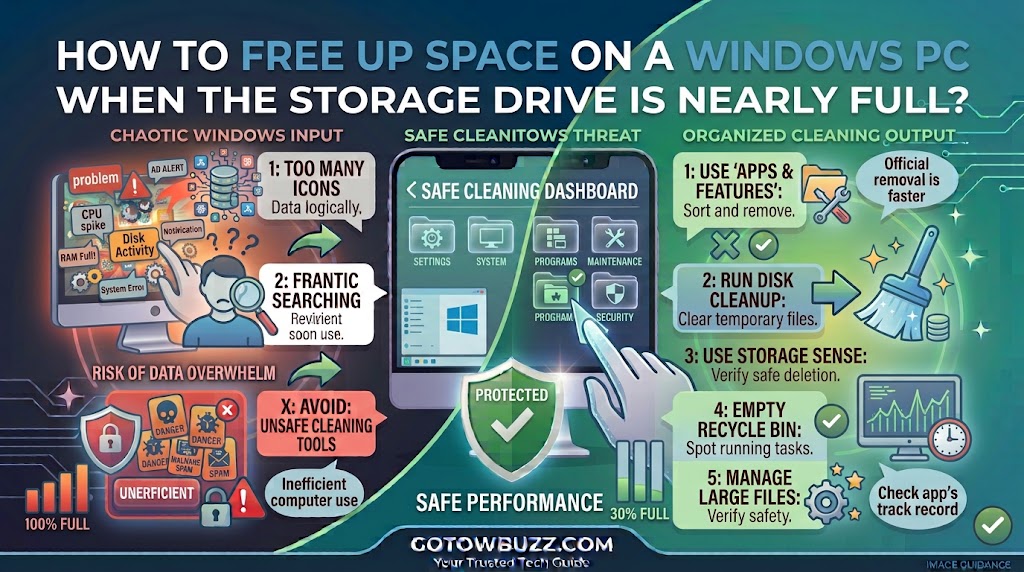
When your Windows PC says the storage drive is almost full, the problem can feel bigger than it really is. You may notice slower performance, failed Windows updates, or warnings that there isn’t enough disk space to save new files.
The good news is that you don’t usually need to buy a new computer or start deleting random folders. Windows has several built-in tools that can show you what’s using your storage and help you remove files you no longer need.
The safest approach is to find out where the space is going first. Then clean temporary files, review large personal files, remove unused programs, and deal with cloud files or other storage that doesn’t need to stay on the PC.
This guide focuses on those steps in a sensible order, starting with the easiest and safest options.
Find Out What Is Filling Your Drive
Before deleting anything, check how much space is actually available and which categories are taking up the most room.
On most Windows PCs, the main system drive is C:. Windows uses this drive for the operating system, updates, applications, temporary files, and often your personal folders.
Step 1: Check your available storage
Open File Explorer by pressing Windows key + E.
Select This PC from the left side of the window.
Under Devices and drives, look for your main drive, usually labeled Local Disk (C:). You’ll see a storage bar showing how much space is used and how much remains.
[Screenshot 1: File Explorer’s This PC page showing the C: drive with a nearly full storage bar]
Screenshot purpose: Show readers exactly where Windows displays the available space on the main drive.
Screenshot caption: Check the C: drive in This PC before deciding what to delete.
You can get more detail by opening Start > Settings > System > Storage. Windows breaks storage into categories such as installed apps, temporary files, system files, documents, pictures, and other data.
[Screenshot 2: Windows Settings > System > Storage showing storage categories and their space usage]
Screenshot purpose: Show how Windows identifies the categories consuming the most storage.
Screenshot caption: Windows Storage settings help identify where your drive space is going.
This step matters because deleting a few small files won’t help much if a large video collection, game installation, or application is using most of the drive.
Use Windows Storage Sense First
If you want Windows to handle some of the basic cleanup automatically, Storage Sense is a good place to start.
Storage Sense can remove unnecessary temporary files and manage items such as files in the Recycle Bin. It can also work with cloud content under certain settings. Microsoft says Storage Sense works on the system drive, normally C:.
Step 2: Turn on Storage Sense
Open:
Start > Settings > System > Storage
Find Storage Sense and turn it on.
You can also open the Storage Sense settings to control how frequently Windows runs it and what types of files it manages.
[Screenshot 3: Windows 11 Storage settings with Storage Sense enabled]
Screenshot purpose: Highlight the Storage Sense switch and the settings available underneath it.
Screenshot caption: Turn on Storage Sense to let Windows handle routine storage cleanup.
If your drive is already very full, you can use the option to run Storage Sense immediately rather than waiting for its normal schedule.
Microsoft also notes that Storage Sense doesn’t automatically manage everything. For example, Downloads and cloud content aren’t automatically removed unless you configure those options.
That is useful because it reduces the chance of Windows unexpectedly removing files you intended to keep.
Review Cleanup Recommendations
Windows can also suggest things that may be safe to remove.
Go to:
Start > Settings > System > Storage > Cleanup recommendations
Depending on your system, you may see categories such as temporary files, large or unused files, cloud-synced files, and unused apps.
Windows shows how much space particular categories could free before you clean them.
Step 3: Review the recommendations carefully
Open each category rather than selecting everything automatically.
Look at the filenames, file sizes, and dates.
If you recognize something as unnecessary, select it and choose Clean up.
Be particularly careful with personal files. A large video that Windows identifies as an unused file may still be something you want to keep.
[Screenshot 4: Windows Cleanup recommendations page showing Temporary files, Large or unused files, and Unused apps]
Screenshot purpose: Show readers where Windows presents its suggested cleanup categories and where they can review individual recommendations.
Screenshot caption: Review Windows’ cleanup suggestions before removing anything.
One item that deserves extra attention is Previous Windows installation(s). If you recently upgraded Windows, this can include the previous installation that allows you to return to the earlier version. Microsoft warns that deleting it removes that rollback option and can’t be undone through the normal recovery process.
Don’t remove it simply because it appears near the top of a cleanup list. Make sure you no longer need the ability to return to the previous Windows installation.
Delete Temporary Files
Temporary files are another common source of unnecessary storage usage.
Windows and applications create temporary data while performing different tasks. Some of it gets removed automatically, but some temporary files can remain longer than expected.
Step 4: Review Temporary files
Go to:
Start > Settings > System > Storage > Temporary files
Windows will calculate the amount of space associated with different temporary-file categories.
Read the descriptions before selecting anything.
You may see items related to temporary files, thumbnails, Windows update cleanup, Recycle Bin contents, or other system-generated data.
[Screenshot 5: Windows Temporary files page with cleanup categories and their storage sizes]
Screenshot purpose: Show readers how to review individual temporary-file categories before choosing what to remove.
Screenshot caption: Check each temporary-file category before starting the cleanup.
Don’t assume that every item should be deleted immediately. If you’re unsure about a category, leave it alone and deal with the obvious items first.
When you’re ready, select the appropriate files and choose Remove files.
Afterward, return to Settings > System > Storage and check whether the available space has increased.
Empty the Recycle Bin
Deleting a file in File Explorer doesn’t necessarily mean its storage is immediately recovered.
Files moved to the Recycle Bin continue using space until the bin is emptied.
Step 5: Empty the Recycle Bin
If you’re certain you don’t need anything currently in the Recycle Bin, right-click the Recycle Bin on your desktop and select Empty Recycle Bin.
Windows will ask you to confirm the action.
Once you empty it, the deleted files are no longer available through the normal Recycle Bin recovery process.
This is worth checking when your drive is nearly full because a large collection of deleted videos, installers, or other files can still consume a noticeable amount of storage.
[Screenshot 6: Windows desktop showing the Recycle Bin context menu with Empty Recycle Bin]
Screenshot purpose: Clearly show the location of the Empty Recycle Bin command.
Screenshot caption: Empty the Recycle Bin only after checking that you don’t need the deleted files.
Find Large Files You Actually Want to Keep
If Windows cleanup tools don’t recover enough space, look at your personal files.
Large videos, old downloads, disk images, backups, archived projects, and game recordings can quietly consume dozens of gigabytes.
Microsoft specifically recommends checking folders such as Videos, Music, Pictures, and Downloads when looking for large personal files.
Step 6: Sort files by size
Open File Explorer and open a folder such as Downloads.
Change the folder view to Details.
Then sort the contents by Size so the largest files appear together.
Look for files you no longer need.
For example, you might discover:
- A 12 GB video you already uploaded elsewhere
- Old Windows or software installers
- Duplicate ZIP archives
- Large screen recordings
- Forgotten downloaded movies
- Old project folders
Don’t delete a file simply because it’s large. Open or inspect it first if you’re unsure what it contains.
If you want to keep the file but don’t need it on your computer every day, move it to an external drive instead.
Move files to another drive
Connect a USB drive or other suitable external storage device.
Open the folder containing the files you want to move.
Select the files, choose Cut, open the destination on the external drive, and choose Paste.
After confirming that the files are safely stored on the other drive, you can check the available space on C:.
Microsoft recommends external storage as one option for moving personal files that you want to keep but don’t need stored on the PC.
[Screenshot 7: File Explorer showing a large file selected and the external USB drive visible in the navigation pane]
Screenshot purpose: Illustrate the process of moving large personal files from the crowded system drive to external storage.
Screenshot caption: Move large files you want to keep to another storage location.
Uninstall Programs You No Longer Use
Installed applications can consume much more space than expected.
Games are an obvious example, but video editors, development tools, virtual machines, office suites, and older applications can also be large.
Step 7: Remove unused applications
In Windows 11, open:
Start > Settings > Apps > Installed apps
Find an application you no longer need.
Select the three-dot menu beside it and choose Uninstall.
Follow the application’s removal instructions.
Microsoft documents this as the normal Settings-based method for removing apps in Windows 10 and Windows 11.
[Screenshot 8: Windows Settings > Apps > Installed apps showing an application’s three-dot menu and Uninstall option]
Screenshot purpose: Show beginners exactly where the uninstall option appears.
Screenshot caption: Remove applications you no longer use from Installed apps.
Don’t uninstall something merely because you don’t recognize the name. Some applications are components used by Windows or other programs.
If you’re unsure about an application, search its name first or check its publisher and installation date.
Also avoid removing several programs at once just to save time. Uninstalling one large application may provide all the space you need.
Use Disk Cleanup When You Need Another Cleanup Option
Windows also includes the older Disk Cleanup utility.
It’s useful for reviewing temporary and system files, particularly on systems where the newer Storage interface isn’t showing everything you need.
Step 8: Open Disk Cleanup
Select Start and search for Disk Cleanup.
Open the tool and select the drive you want to clean, usually C:.
Windows will calculate how much space can be recovered.
You can then review the available categories.
For additional system cleanup, select Clean up system files, choose the drive again, and wait while Windows recalculates the available cleanup options.
[Screenshot 9: Windows Disk Cleanup window showing available file categories and the Clean up system files button]
Screenshot purpose: Show readers the classic Disk Cleanup interface and the option that reveals additional system files.
Screenshot caption: Disk Cleanup can identify additional temporary and system files that may be removable.
As with Storage settings, read the descriptions before deleting anything.
If Previous Windows installation(s) appears, remember that removing it eliminates the normal option to return to that previous Windows installation.
Make OneDrive Files Online-Only When Appropriate
If you use OneDrive, locally stored cloud files may be using more drive space than you realize.
OneDrive’s Files On-Demand feature allows files to remain visible in File Explorer without keeping their full contents stored locally.
An online-only file can be downloaded when you need it. Microsoft identifies these files with a cloud icon, while locally available files use different status icons.
Step 9: Free up space from OneDrive files
Open your OneDrive folder in File Explorer.
Find a file or folder that you don’t need available offline.
Right-click it and choose Free up space.
The file remains in OneDrive but no longer needs to occupy the same local storage on your PC.
[Screenshot 10: OneDrive folder in File Explorer with the right-click menu showing Free up space]
Screenshot purpose: Show the exact OneDrive command that changes a locally stored file back to online-only status.
Screenshot caption: Use Free up space to keep OneDrive files online without storing their full contents locally.
This is different from deleting a OneDrive file.
Choosing Free up space does not delete the file from OneDrive. Deleting the file does. Microsoft specifically warns that deleting a OneDrive file can remove it from OneDrive and other synced locations.
That distinction is extremely important.
Change Where New Files Are Saved
Freeing space today is useful, but preventing the same problem from returning is even better.
If your PC has another internal drive with plenty of free space, you can change where Windows saves certain types of new content.
Go to:
Start > Settings > System > Storage > Advanced storage settings > Where new content is saved
Depending on your Windows version and available drives, you can choose another location for new apps, documents, music, pictures, and videos.
This can be especially helpful on a PC with a small SSD used for Windows and a larger secondary drive for personal files.
Don’t change these locations blindly, though. Make sure the destination drive stays connected and has enough capacity.
What Not to Delete From a Nearly Full Windows Drive
When storage is low, it’s tempting to open the C: drive and start deleting unfamiliar folders.
That’s usually a bad idea.
Don’t manually delete random files from folders such as Windows, Program Files, or other system locations just because they look large.
Windows manages many of these files itself.
The safer approach is to use Storage settings, Cleanup recommendations, Storage Sense, Disk Cleanup, application uninstallers, and File Explorer for your own personal files.
Avoid registry cleaners and questionable “PC cleanup” programs that promise to remove hundreds of unnecessary files with one click. You don’t need an unknown utility to perform the basic cleanup Windows already provides.
What If You Still Have Almost No Free Space?
If you’ve completed the normal cleanup steps and the drive remains nearly full, look at the storage breakdown again.
If Installed apps is very large, review your applications and games.
If Videos, Pictures, Downloads, or Documents are large, inspect those folders manually.
If System & reserved is taking significant space, don’t start deleting system folders yourself. Use Windows’ built-in cleanup options and investigate unusual behavior before making deeper changes.
If free space disappears again shortly after cleanup, that’s a different problem.
A rapidly filling drive could be caused by an application generating large files, repeated downloads, synchronization problems, update-related issues, or, in some cases, unwanted software.
If you suspect malware, run a scan with Windows Security. Microsoft also recommends antivirus scanning when malware may be contributing to unusual disk usage.
If the Storage Number Doesn’t Change After Deleting Files
Sometimes you delete a large file and the amount of free space doesn’t appear to change.
First, check the Recycle Bin. Deleted files may still be stored there.
Next, give Windows a moment to update its storage calculation.
If you deleted a cloud-synced file, make sure you understand whether you deleted it or simply made it online-only.
For OneDrive, choosing Free up space is not the same as deleting the file. The former removes the local copy while keeping the file in OneDrive.
If the drive keeps filling again, don’t continue deleting random files. Find which category or folder is growing.
A Simple Cleanup Order That Works Well
When a Windows drive is nearly full, you don’t need to perform every possible cleanup task.
A sensible order is:
- Check Settings > System > Storage.
- Run or configure Storage Sense.
- Review Cleanup recommendations.
- Check Temporary files.
- Empty the Recycle Bin if appropriate.
- Sort personal folders by file size.
- Move large files you want to keep to another drive.
- Uninstall applications you no longer use.
- Review OneDrive files and use Free up space where appropriate.
- Use Disk Cleanup if additional system cleanup is needed.
After each major step, check the available space again.
This makes it easier to see what actually helped instead of making many changes at once.
How to Keep Your Windows Drive From Filling Up Again
Once you’ve recovered enough space, make a few small changes.
Keep an eye on the Downloads folder. It often becomes a storage dumping ground because installers, ZIP files, documents, videos, and other downloads accumulate without much attention.
Review large videos and old project folders every few months.
Uninstall programs you genuinely no longer use.
If your computer has multiple drives, consider storing large media libraries and other non-system files on the drive with more capacity.
You can also use Windows’ Where new content is saved settings to direct certain new files or applications to another drive.
If you use OneDrive, Files On-Demand can reduce the amount of local storage consumed by files that don’t need to be available offline.
Most importantly, don’t wait until the drive is completely full. Keeping some free space available gives Windows room for temporary files and updates.
Frequently Asked Questions
How much free space should I keep on my Windows drive?
There isn’t one universal number that works for every PC because storage needs depend on the drive’s total capacity and how the computer is used. However, if Windows is warning that the drive is nearly full, it’s a good time to start cleaning rather than waiting until there is almost no space left.
Does deleting temporary files make Windows faster?
It can recover storage and may help when low disk space is contributing to performance problems. Microsoft notes that low disk space can affect PC performance and make it harder to install Windows updates.
However, deleting temporary files isn’t a universal solution for every slow-PC problem.
Is it safe to use Storage Sense?
Storage Sense is a built-in Windows feature designed to automatically remove certain unnecessary files and manage storage. You can review its settings to control when it runs and what it manages.
You should still review settings involving the Recycle Bin, Downloads, and cloud content before relying on automatic cleanup.
Can I delete files from the Windows folder to get more space?
You shouldn’t manually delete random files from the Windows system folders. Use Windows’ built-in Storage settings, Cleanup recommendations, Storage Sense, or Disk Cleanup instead.
Removing system files without understanding their purpose can cause other problems.
Why is my C: drive full when I don’t have many personal files?
Applications, games, temporary files, Windows updates, system data, cloud-synced files, and other system-managed content can consume significant storage.
Open Settings > System > Storage to see which categories are actually using the space instead of guessing.
Does OneDrive’s Free up space option delete my files?
No. When used correctly, Free up space changes a locally stored OneDrive file to online-only status. The file remains in OneDrive, but you need an internet connection to access the online-only copy.
Be careful not to choose Delete when your intention is only to remove the local copy.
What should I do if my drive becomes full again after cleaning it?
Check which storage category is growing again. If a particular folder or application keeps consuming space, identify what is creating the data before deleting more files.
If the growth is unexplained or accompanied by other unusual computer behavior, run a Windows Security scan and consider getting technical assistance.
Final Thoughts
A nearly full Windows drive doesn’t automatically mean you need a larger SSD or a new computer.
Start by checking Settings > System > Storage so you know what’s actually consuming your space. Then work through Storage Sense, temporary files, cleanup recommendations, personal files, unused applications, and cloud storage.
The most important rule is simple: know what you’re deleting before you delete it.
Windows already provides several useful tools for routine cleanup, so there’s usually no reason to start removing unknown system folders or install a questionable third-party “cleaner.” If you regularly review large files and keep an eye on your storage usage, it becomes much easier to prevent the same low-space warning from coming back.
Sources Used for Accuracy
- Microsoft Support — Free up drive space in Windows
- Microsoft Support — Manage drive space with Storage Sense
- Microsoft Support — Storage settings in Windows
- Microsoft Support — Uninstall or remove apps and programs in Windows
- Microsoft Support — Save disk space with OneDrive Files On-Demand for Windows
- Microsoft Support — Free up drive space in Windows / Disk Cleanup