
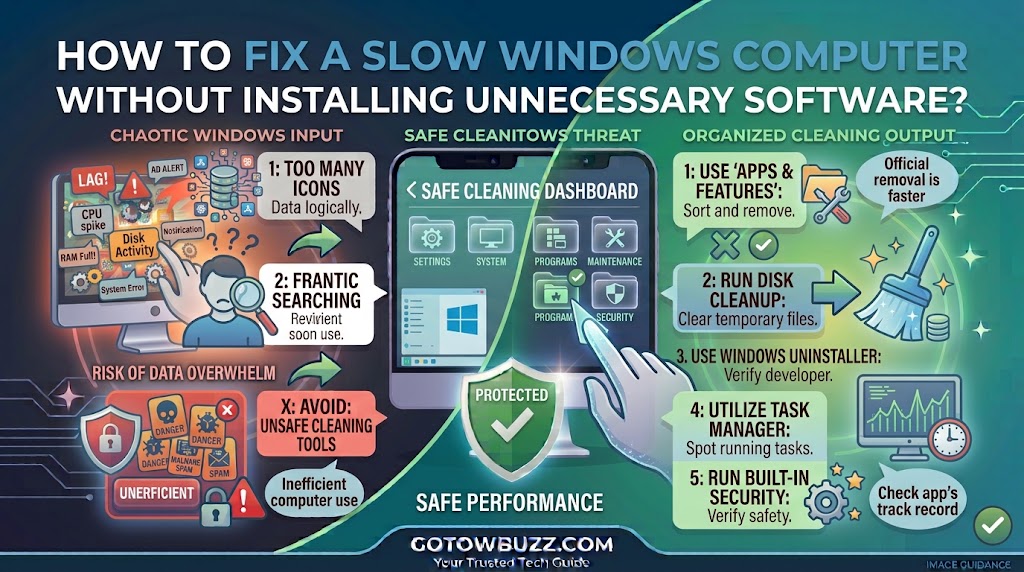
Introduction
If your Windows computer takes a long time to start, freezes when you open several programs, or takes noticeably longer to open files, don’t install a “PC optimizer” just yet.
Windows already includes several tools that can help you find out what’s slowing the computer down. Task Manager can show which programs are using CPU, memory, and disk resources. Storage settings can reveal whether the drive is running short on space. Startup settings can show which applications launch automatically when you sign in. Windows Update can also address software and driver issues. Microsoft lists limited storage, too many startup applications, outdated software, and aging hardware among common reasons for poor Windows performance.
The important part is to diagnose the slowdown before changing things.
If one application is consuming most of your memory, the solution is different from a computer that has almost no free storage. And if an older hard drive or limited amount of RAM is the real bottleneck, no amount of cleanup software will turn the machine into a modern PC.
This guide walks through the safest built-in Windows options first, starting with simple checks and moving toward more advanced troubleshooting only when necessary.
Main Article
First, Work Out What “Slow” Actually Means
A slow computer can have several different symptoms.
Maybe Windows takes several minutes to start.
Maybe the desktop appears quickly, but programs take a long time to open.
Maybe the computer becomes slow only when you’re using Chrome, Edge, or another browser with many tabs.
Or perhaps everything works normally until you open a video editor, game, or other demanding application.
These differences matter.
Before changing anything, use the computer normally for a few minutes and ask yourself:
When does it become slow?
If the slowdown happens immediately after startup, startup applications may be involved.
If the computer slows down when several programs are open, memory usage could be a factor.
If opening files is unusually slow and the disk usage stays high, storage or disk activity deserves attention.
If the entire system has become slower over months or years, the hardware itself may now be limiting performance.
The goal isn’t to make every number in Task Manager as low as possible.
The goal is to identify what is actually causing the problem.
Step 1: Restart Windows Before Doing Anything Complicated
This sounds almost too simple, but it’s worth doing first.
If your computer has been running for several days, you’ve probably opened and closed many applications, installed updates, used a browser with numerous tabs, and left background programs running.
A restart gives Windows a fresh session.
Restart the computer
- Save your work.
- Select Start.
- Select the Power button.
- Select Restart.
- Wait for Windows to return to the desktop.
- Open only the applications you normally use.
- Check whether the slowdown is still present.
Microsoft includes restarting the PC among its recommended first steps for performance and software problems.
[Screenshot 1: Windows 11 Start menu with the Power menu open and the Restart option visible]
Screenshot purpose: Show beginners the correct restart option and make clear that Restart is different from simply closing the laptop lid or turning off the monitor.
Screenshot caption: Restart Windows before trying more complicated performance fixes.
If the computer becomes noticeably faster after restarting but slows down again later, pay attention to what you open afterward. That pattern can point toward a particular application or background process.
Step 2: Use Task Manager to Find the Resource Hog
Before deleting files or changing Windows settings, check what your computer is actually doing.
Task Manager is one of the most useful built-in Windows tools for this.
Press:
Ctrl + Shift + Esc
This opens Task Manager directly. Microsoft also documents this keyboard shortcut for opening it.
You can also right-click the Start button and select Task Manager.
Once it opens, select Processes.
You’ll see columns such as:
CPU
Memory
Disk
Network
These numbers change constantly, so don’t panic if they jump around.
What matters is whether one application or process is consistently using a large amount of a resource while the computer is struggling.
[Screenshot 2: Windows 11 Task Manager on the Processes tab showing CPU, Memory, and Disk columns]
Screenshot purpose: Teach readers where to look when diagnosing a slowdown and how to identify applications consuming unusually high resources.
Screenshot caption: Task Manager can help identify which running applications are putting the most pressure on your PC.
What the numbers can tell you
If CPU stays very high, a program may be doing a lot of processing.
If Memory is consistently close to full, Windows may have limited working memory available for the applications you’re using.
If Disk activity stays very high, Windows or an application may be reading or writing large amounts of data.
Don’t assume that the process at the top is automatically the problem.
For example, Windows itself may temporarily use significant resources while performing an update.
Instead, watch the computer for a minute or two and see whether the same application remains unusually high.
Step 3: Close Programs You Aren’t Using
If you find an ordinary application consuming a large amount of resources and you aren’t using it, close it normally.
For example, if you have several browser windows, a photo editor, a video player, and a large spreadsheet open at the same time, closing what you don’t need may immediately reduce the workload.
You can also select an unresponsive application in Task Manager and choose End task.
But use that option carefully.
Don’t end random Windows processes simply because they have unfamiliar names.
A safer rule
Use End task for a program you recognize and know you don’t need running.
If you don’t know what a process does, leave it alone until you’ve identified it.
Ending an important Windows process can cause an application or part of the desktop to stop working properly.
Microsoft recommends using Task Manager to monitor CPU, memory, disk activity, and troubleshoot processes that may be affecting performance.
Step 4: Stop Unnecessary Programs From Starting With Windows
If your computer is especially slow immediately after signing in, startup applications are worth checking.
Many applications add themselves to the startup process so they can launch automatically.
Some are useful.
Others aren’t.
For example, you may want a security application to start automatically, while a program you use only once a month probably doesn’t need to launch every time Windows starts.
Use Task Manager
- Press Ctrl + Shift + Esc.
- Open Startup apps.
- Look through the list.
- Pay attention to the Startup impact information.
- Select an application you don’t need at startup.
- Select Disable.
Microsoft says Task Manager shows startup impact information and allows you to disable applications that don’t need to launch automatically.
[Screenshot 3: Windows 11 Task Manager > Startup apps showing several applications with their startup impact values]
Screenshot purpose: Show readers how to identify applications that launch with Windows and where the Disable command is located.
Screenshot caption: Disable startup apps you don’t need so they don’t automatically run every time Windows starts.
What should you disable?
Think about the application.
A cloud-storage application that you use throughout the day may be worth leaving enabled.
A game launcher you use once a week probably doesn’t need to start with Windows.
A printer utility may be useful on some computers.
A program with an unfamiliar name deserves research before you disable it.
Don’t disable everything marked High impact.
The impact rating describes its effect on startup; it doesn’t mean the application is unnecessary.
Step 5: Check the Startup List in Settings
Windows also provides startup controls through Settings.
On Windows 11:
Start → Settings → Apps → Startup
You’ll see applications with switches that can be turned on or off.
Microsoft documents this as another way to manage startup applications.
[Screenshot 4: Windows 11 Settings > Apps > Startup showing application startup toggles]
Screenshot purpose: Give readers an alternative to Task Manager and show exactly where Windows keeps the startup controls in Settings.
Screenshot caption: Windows Settings provides another way to control which applications launch automatically when you sign in.
The Settings page is simpler.
Task Manager is more useful when you’re trying to understand the effect an application has on startup.
Either method is fine.
You don’t need a third-party startup manager.
Step 6: Check How Much Storage Space Is Left
A nearly full system drive can contribute to performance problems and can also make Windows updates difficult.
Microsoft notes that low storage can be associated with slower performance and problems installing Windows updates.
To check storage in Windows 11:
- Open Start.
- Select Settings.
- Select System.
- Select Storage.
- Review the storage categories.
Windows can show categories such as installed applications, temporary files, system and reserved storage, and other types of data.
[Screenshot 5: Windows 11 Settings > System > Storage showing the C: drive storage breakdown]
Screenshot purpose: Show readers how to determine whether limited storage could be contributing to the computer’s slowdown.
Screenshot caption: Check Windows Storage settings to see what’s using space on your system drive.
Don’t start deleting folders manually just because they are large.
First identify the category.
If Installed apps is using most of the space, review programs you no longer need.
If Temporary files is large, Windows provides built-in cleanup options.
If personal videos, photos, or downloads are taking most of the space, move or remove files you no longer need after making sure they are backed up.
Step 7: Use Storage Sense Instead of a Random Cleaner
Windows has its own storage-management feature called Storage Sense.
It can automatically remove certain unnecessary temporary files and manage items such as the Recycle Bin according to your settings.
To access it in Windows 11:
- Open Settings.
- Select System.
- Select Storage.
- Select Storage Sense.
- Review the available options.
- Turn it on if its cleanup behavior suits you.
[Screenshot 6: Windows 11 Storage Sense settings page showing the Storage Sense toggle and cleanup options]
Screenshot purpose: Show the built-in Windows alternative to third-party “PC cleaning” applications.
Screenshot caption: Storage Sense can automatically clean certain unnecessary files without requiring a third-party cleaner.
Pay attention to the settings before enabling automatic cleanup.
Microsoft notes that Storage Sense can manage Recycle Bin contents according to your chosen settings, while Downloads and cloud content aren’t handled unless you configure those options.
If you’re concerned about losing files, review the settings instead of turning on every cleanup option without reading it.
Step 8: Remove Programs You No Longer Need
Unused applications take up storage, and some can also run background processes.
Open:
Start → Settings → Apps → Installed apps
Find a program you genuinely don’t need.
Select the three-dot menu and choose Uninstall.
Microsoft specifically recommends uninstalling unused applications as one possible way to free storage and reduce background activity.
[Screenshot 7: Windows 11 Installed apps list with an unused application selected and the Uninstall option visible]
Screenshot purpose: Show readers how to remove unnecessary applications without using a third-party uninstaller.
Screenshot caption: Uninstall applications you no longer use to recover storage and reduce unnecessary background activity.
Don’t remove software simply because you don’t recognize its name.
Some programs are drivers, hardware utilities, Microsoft components, or dependencies used by other applications.
If you don’t know what something is, identify it first.
Step 9: Install Available Windows Updates
An outdated Windows installation can cause compatibility and performance problems.
Microsoft recommends installing Windows updates and, where appropriate, optional driver updates as part of its performance troubleshooting guidance.
On current Windows 11 systems:
- Open Start.
- Select Settings.
- Select Windows Update.
- Select Check for updates.
- Install available updates.
- Restart when Windows asks you to.
[Screenshot 8: Windows 11 Settings > Windows Update showing the Check for updates button and available update status]
Screenshot purpose: Show readers where to check for current Windows updates before attempting more complicated performance fixes.
Screenshot caption: Check Windows Update before assuming that a software problem requires a separate repair utility.
If you see optional driver updates, don’t install every available driver simply because it appears in the list.
A driver update can be useful when it addresses a hardware problem or compatibility issue, but optional doesn’t automatically mean necessary.
Step 10: Reduce Visual Effects if the PC Is Older
Windows uses visual effects to make the interface look smoother.
On an older computer with limited hardware, reducing some effects may improve responsiveness.
Microsoft provides a built-in setting for this.
Search Windows for:
Adjust the appearance and performance of Windows
Open the result.
Under Visual Effects, you can select:
Adjust for best performance
Microsoft lists this as one of its performance troubleshooting options.
[Screenshot 9: Windows Performance Options dialog showing the Visual Effects tab and the Adjust for best performance option]
Screenshot purpose: Show readers the exact Windows setting for reducing visual effects on an older or resource-limited computer.
Screenshot caption: Reducing visual effects can make an older Windows PC feel more responsive.
There’s a trade-off.
The Windows interface may look less polished because some animations and visual effects will be reduced.
If you don’t notice a useful improvement, you can return to the previous setting.
Step 11: Check Whether Your Power Mode Is Limiting Performance
Windows can prioritize battery life or performance.
On a laptop, a battery-saving power mode can reduce performance to extend battery life.
If you’re plugged into power and need more responsiveness, check:
Settings → System → Power & battery → Power mode
On supported Windows configurations, Microsoft provides a Best performance option. It can increase power consumption, drain a laptop battery faster, and cause the computer to run warmer.
This isn’t something you need to leave enabled all the time.
If you’re trying to diagnose poor performance on a laptop, you can test whether the computer behaves differently while plugged in and using a higher-performance power mode.
If it becomes noticeably faster, power management may have been part of the problem.
Step 12: Check Task Manager Again After Making Changes
Don’t make ten changes at once and then try to guess which one helped.
After disabling unnecessary startup applications and freeing some storage, restart the computer.
Then open Task Manager again.
Look at:
CPU
Memory
Disk
Compare what you’re seeing with the original problem.
If the computer now starts quickly and applications open normally, stop there.
You don’t need to keep changing settings just because another optimization exists.
That’s one of the biggest advantages of troubleshooting with built-in Windows tools: you can make a small change, observe the result, and avoid unnecessary modifications.
What You Should Not Install Just Because Your PC Is Slow
A slow computer can make advertisements for “one-click PC boosters” look tempting.
Be cautious.
You don’t need to install software simply because it promises to:
- Clean the Registry
- Boost RAM instantly
- Repair hundreds of errors
- Defragment everything automatically
- Make Windows dramatically faster
- Fix every driver with one click
- Remove all “junk” files
Some third-party utilities may have legitimate uses, but installing software you don’t need creates another application to maintain and another source of background activity.
For ordinary performance troubleshooting, start with Windows’ own tools.
Microsoft itself provides built-in options for startup management, storage cleanup, performance monitoring, visual effects, updates, and drive optimization.
Don’t Start Editing the Windows Registry
Registry-cleaning advice is still common on the internet.
For a normal slow-PC problem, you don’t need to start deleting Registry entries.
The Registry contains configuration information used by Windows and applications.
Removing entries because a cleaner says they are “invalid” doesn’t automatically make Windows faster.
It can also create new problems if an important setting is removed.
Stick with the normal Windows settings unless you’re following a specific, trustworthy troubleshooting procedure for a known problem.
What If the Computer Is Still Slow?
If you’ve restarted Windows, reduced unnecessary startup activity, freed storage, installed available updates, and identified resource-heavy applications but the computer remains slow, look at the hardware.
Microsoft notes that older PCs with outdated hardware may not see significant improvements from software-based performance steps.
Check the RAM
If your computer has limited memory and you regularly run several demanding applications at once, Windows may struggle to keep everything responsive.
Task Manager can help you see how much memory is being used.
Check the storage drive
A computer using an older mechanical hard drive can feel much slower than a similar machine using an SSD.
If the system drive is constantly busy, the storage device may be part of the problem.
Consider the processor
If CPU usage stays high during ordinary tasks, an older or lower-powered processor may simply have limited capacity for the software you’re running.
Look at the age of the computer
If the computer is several years old and increasingly struggles with normal tasks, replacing or upgrading hardware may make more sense than repeatedly installing optimization utilities.
Microsoft specifically lists consistently high CPU, memory, or disk usage and increasing delays with everyday tasks among signs that an older PC may need more than basic software troubleshooting.
Troubleshooting / Common Problems
Task Manager shows high CPU usage, but I don’t know which program is responsible
Open Task Manager → Processes and watch the CPU column for a minute.
If one recognizable application stays near the top while the computer is slow, close that application and see whether performance improves.
If a Windows system process is responsible, don’t end it just because it is using resources. Search for the exact process name using Microsoft’s documentation or another trustworthy source first.
My computer is slow only after startup
Start with Startup apps.
Open Task Manager with Ctrl + Shift + Esc, select Startup apps, and review applications with high startup impact. Microsoft specifically recommends disabling startup applications you don’t need.
My C: drive is almost full
Open:
Settings → System → Storage
Review the categories before deleting anything.
Use Storage Sense or Windows’ cleanup recommendations where appropriate. Microsoft notes that low storage can affect performance and interfere with Windows updates.
My computer becomes slow when I open many browser tabs
Check memory usage in Task Manager.
If memory consumption rises substantially as you open more tabs and applications, close tabs you no longer need and close other programs running in the background.
If this happens regularly, additional RAM may provide a more meaningful improvement than a software cleaner.
I disabled startup apps but Windows is still slow
Startup applications are only one possible cause.
Check storage, memory, CPU, and disk activity in Task Manager.
Also install available Windows updates and check whether the slowdown occurs with one particular application or throughout the entire system.
Should I use a registry cleaner?
For this problem, there is no reason to start with one.
Windows already provides tools for checking performance, managing startup programs, removing unused applications, and cleaning temporary files.
Windows is slow after an update
Give the computer some time if Windows has recently completed a major update, especially if background activity is still occurring.
Restart the computer and check for additional updates.
If the slowdown continues, use Task Manager to determine whether a particular process is consuming resources instead of assuming the update itself is the cause.
Practical Tips
Keep some free space on the system drive
Don’t wait until Windows is constantly warning you about low storage.
Check Settings → System → Storage occasionally and remove or move files you no longer need.
Don’t let every application start with Windows
When you install a new program, check whether it has added itself to startup.
If you don’t need it immediately after signing in, consider disabling its startup behavior.
Restart occasionally
A restart is a simple troubleshooting step and can clear temporary states created during a long session.
Watch before changing
Task Manager is most useful when you observe the computer while the slowdown is actually happening.
Don’t change settings based on a screenshot taken when the PC is behaving normally.
Make one or two changes at a time
If you disable 15 startup programs, delete temporary files, change visual effects, alter power settings, and uninstall applications all at once, you won’t know what actually helped.
Small changes make troubleshooting easier.
Back up important files
Before major troubleshooting, keep a current backup of important documents, photos, work files, and other data you can’t replace.
If the computer’s performance problem turns into a larger Windows or hardware problem, having a backup can save you a lot of stress.
Frequently Asked Questions
What is the safest way to speed up a slow Windows computer?
Start with Windows’ built-in tools. Restart the computer, use Task Manager to identify heavy processes, manage unnecessary startup applications, check available storage, install Windows updates, and remove programs you genuinely don’t need. Microsoft recommends several of these steps for Windows 10 and Windows 11.
Do I need a PC cleaner to make Windows faster?
Usually, no. Windows includes Task Manager, Storage settings, Storage Sense, uninstall tools, startup management, and other performance controls. Start with these tools before installing additional software.
Can low storage make a Windows computer slow?
It can contribute to performance problems, and Microsoft specifically notes that low storage can cause slower performance and make Windows updates difficult to install.
Should I disable every startup program?
No. Disable only applications you recognize and don’t need to launch automatically. Security software and applications you rely on immediately after signing in may need to remain enabled. Task Manager’s startup-impact information can help you decide which programs deserve closer attention.
Will turning off Windows visual effects make my computer faster?
It can improve responsiveness on some older or resource-limited computers, but the difference depends on the hardware. Microsoft includes the Adjust for best performance option as one possible Windows performance adjustment.
Why is my PC still slow after cleaning up storage?
Storage may not be the main problem. Check CPU, memory, and disk activity in Task Manager. If the hardware is older or consistently reaches its limits during normal tasks, a hardware upgrade or replacement may provide a larger improvement than additional software cleanup.
Is it worth resetting Windows if my PC is slow?
A reset is a much bigger step and shouldn’t be the first response to an ordinary slowdown. Try the built-in diagnostic and cleanup options first. If serious software problems remain, back up your important files and investigate Windows recovery options before resetting the computer. Microsoft provides Reset this PC as a recovery option for more significant problems.
Final Thoughts
A slow Windows computer doesn’t automatically need a cleaner, optimizer, or another program running in the background.
Start with what Windows already gives you.
Restart the PC, watch Task Manager while the slowdown is happening, reduce unnecessary startup applications, check your storage, remove software you no longer need, install available updates, and make only the performance changes that address an actual problem.
If those steps don’t make much difference, don’t keep installing optimization utilities.
At that point, look at the hardware.
An aging hard drive, limited RAM, an older processor, or a computer that simply no longer meets the demands of your everyday software may be the real reason it feels slow.
The best fix isn’t the one that changes the most settings. It’s the one that identifies the actual bottleneck and changes only what needs changing.
Sources Used for Accuracy
- Microsoft Support — Tips to improve PC performance in Windows. Used as the primary source for Microsoft’s current performance recommendations, including updates, unused applications, startup apps, background activity, visual effects, power mode, drive optimization, Task Manager, and restarting Windows.
- Microsoft Support — Configure Startup applications in Windows. Used to verify current Windows 10/11 startup-app controls and Task Manager’s startup-impact information.
- Microsoft Support — Storage settings in Windows. Used to verify the current Storage interface and storage categories in Windows 10/11.
- Microsoft Support — Manage drive space with Storage Sense. Used to verify Storage Sense behavior and its cleanup settings.
- Microsoft Support — Free up drive space in Windows. Used to verify the relationship between low storage, performance, and Windows updates.
- Microsoft Support — System configuration tools in Windows. Used to verify Task Manager’s role in monitoring CPU, memory, disk, network activity, and startup applications.
- Microsoft Support — How to know it’s time for a new PC. Used to explain when software troubleshooting may not provide meaningful improvement because of aging hardware or consistently high resource usage.
- Microsoft Support — How to perform a clean boot in Windows. Used to establish the boundary between ordinary troubleshooting and advanced clean-boot troubleshooting, including Microsoft’s warning about using System Configuration carefully.